A Dutch Alternative Method
Search this site:
Webmaster:
How to create large toroids that are cheap,
Some basic craftsmanship and tools are needed, and the construction takes three or more evenings,
This is an article in his own words by Mark, a Dutch coiler:
How to create large toroids that are cheap,
lightweight, smooth and will not dent.
since various stages will need time to dry overnight.
All parts are readily available at your local DIY-centre or, with a little luck, very cheap at a dump store.
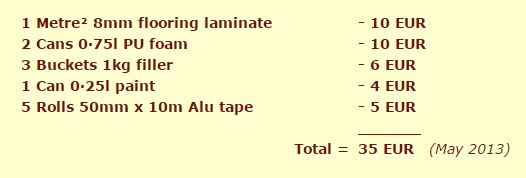
Here's the shopping list:
Step 1
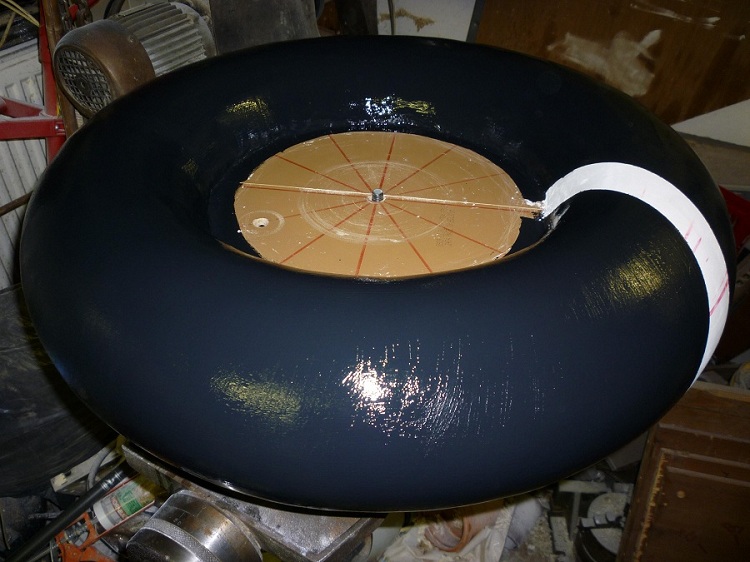
Determine the dimensions for both the minor and outer diameters. Personally I think a ratio of 1:4 has the best looking proportions for any toroid. For this one, the minor diameter is 16cm, outer diameter 64cm and total weight 5kg. ( 6·3" x 25·2" and 11lbs ) Capacitance is 27·8pF
I recommend using flooring laminate, rather than MDF or multiplex. MDF will sag out of shape over time and multiplex splinters too much on the edges. Laminate has a higher density, doesn't sag or splinter and gives nice clean edges when machined.
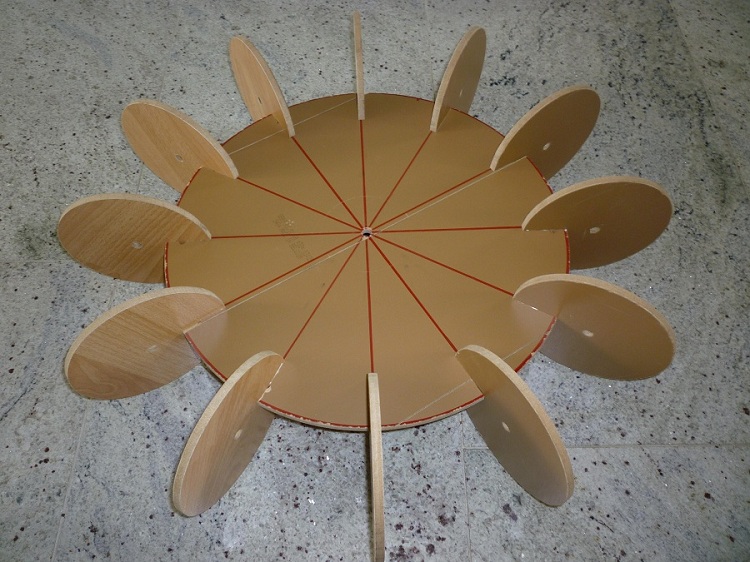
Saw twelve equal pieces out of the laminate and drill a hole in the middle of each. Then using a router, machine them into the twelve disks for the minor diameter ribs. Clamp the disks together in a vice, aligned with a bolt through their central hole. Then mill or router an 8mm wide (the thickness of the laminate) 25mm deep slot.

For the centre plate (above), either some laminate sheets are glued together to make a disk, or a single piece of a suitable material is used that has a diameter equal to 2 minor diameters + 100mm, here it is 42cm. Again, drill a hole in the centre of the sheet, draw a circle and mark the positions for the minor diameter ribs. Once the disk is cut out, using a router, machine 8mm wide and 25mm deep slots at the marked positions.
Step 2
Assemble the toroid frame, using some glue to fix the disks.
Step 3
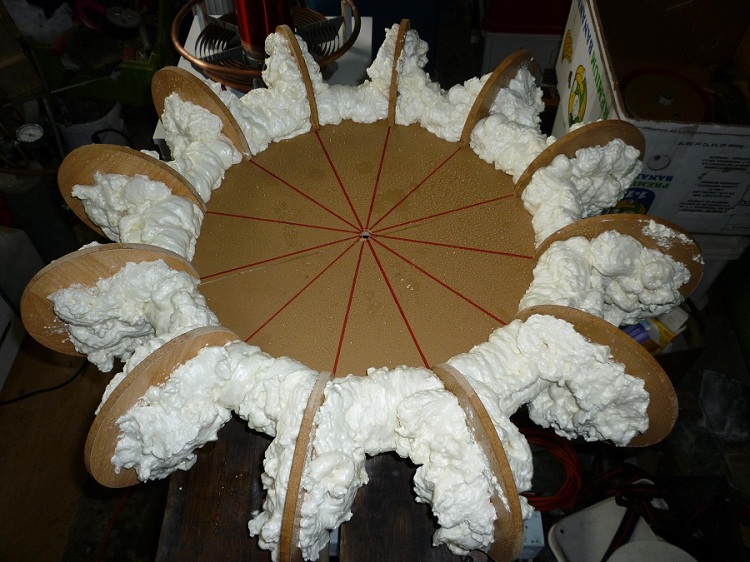
Shake the PU foam cans and spray some water over the frame for better adhesion. USE GLOVES or you'll be walking around with foam on your hands for two weeks!
Build up several layers of foam, allowing 10-15 minutes between each layer or else gravity will turn it into a big mess. Don't try to fill the space up all in one go, as this causes cavities and soft spots.
If the foam is expanded too much, don't worry, after 10-15 minutes the bulges can be tapped back into shape.
Call it a day and grab a beer, as the foam needs to harden overnight before advancing to the next step.
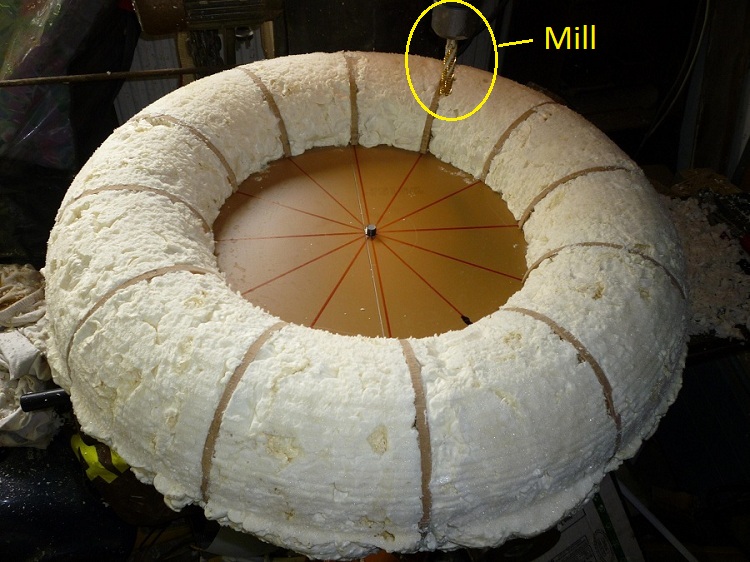
Step 4
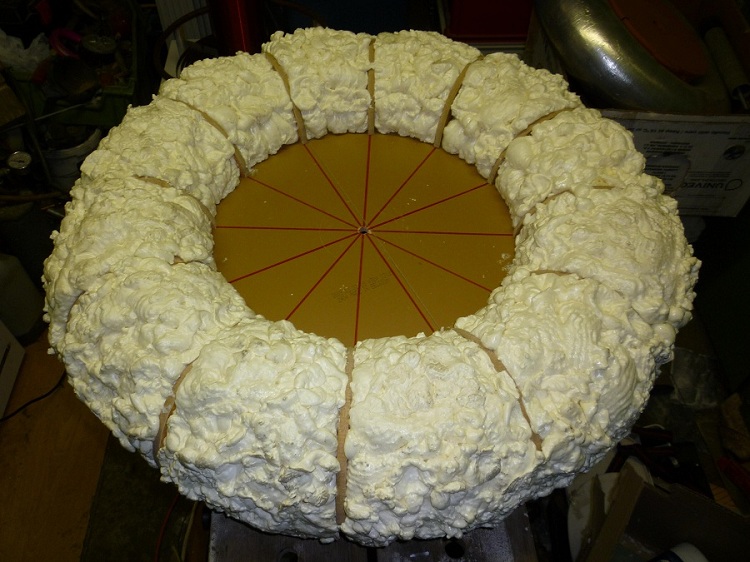
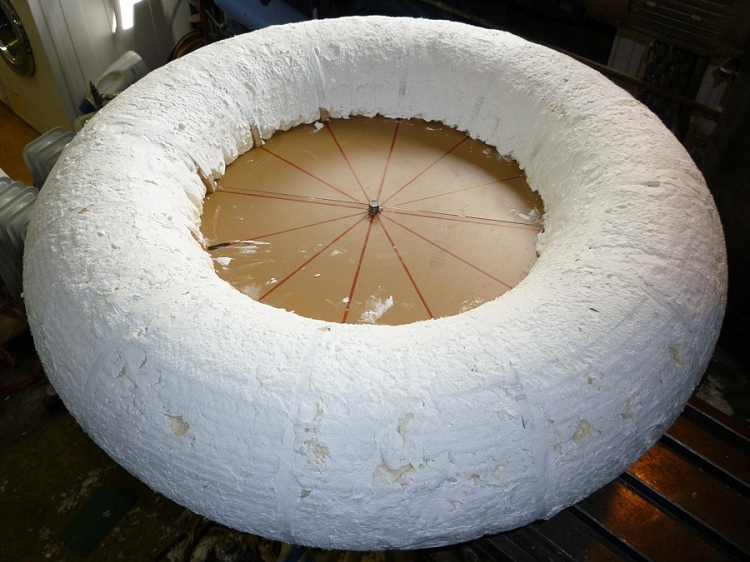
Mount the toroid on a vertical shaft, so that it can be rotated, but maintains horizontal stability. Using the laminate disks as guiding, the contours of the toroid's top half can be milled in 5mm steps. When done, use some rough sandpaper to smooth out the left over ridges. Repeat the process on the other half.
After milling and then sanding a bit, you will have a perfect toroid shape. The surface will be a bit rough, but will have perfect adhesion for the cheapest filler you can find.
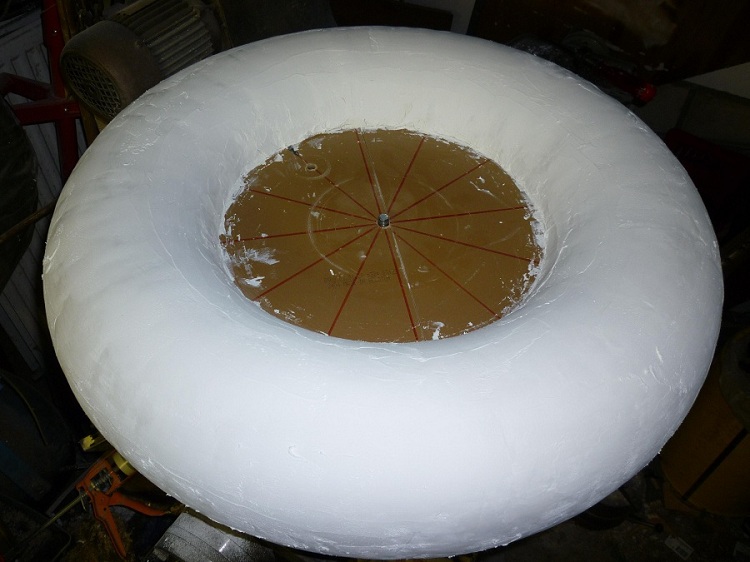
Step 5
Remove any leftover loose foam particles and, using a flexible filling knife, start with a thin layer of filler and let things dry. Remember, if you put on too much it has to be sanded away again, so apply thin layers each time. Once you're pleased with the smoothness it's time for the next step.
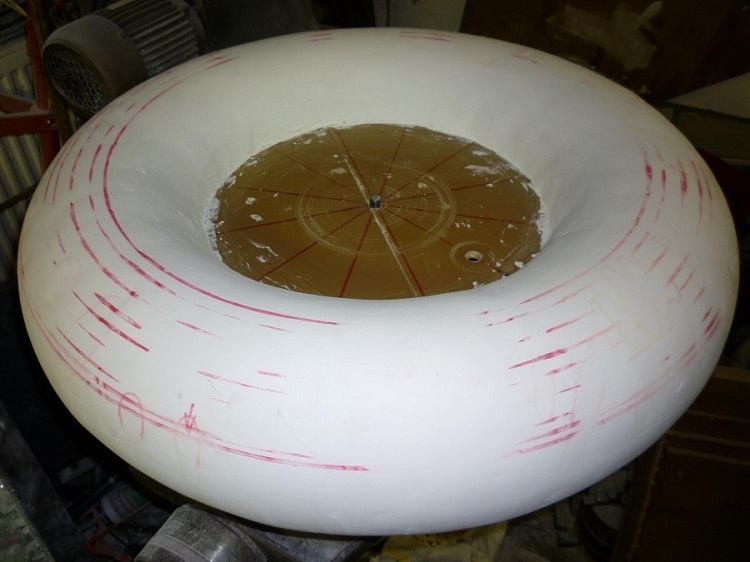
Step 6
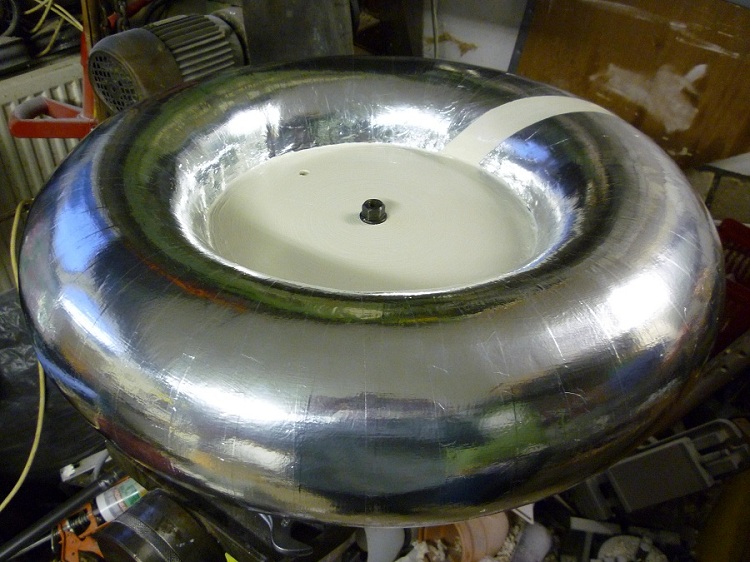
Apply a coat of paint and allow it to dry, this gives the Alu' tape something to stick on.
Step 7
Place the toroid on a horizontal shaft to apply the Alu' tape. Cut the tape into strips. Remove half of the backing and work from the middle to the centre plate, then the other half. Smooth creases before applying the next strip, and then work your way around.
* Note 1:
As an experiment I intentionally did not cover the centre plate with aluminium tape, and I also left a gap in the circumference. In theory this should prevent losses caused by Eddy currents, in fact, it should act as an extra turn.
** Note 2:
As soon as the toroid got finished, I accidentally bumped into it with a tool. The good part was that it didn't dent, but it scraped a piece of the Alu' tape away. To repair it, I removed the wrinkled tape and applied a full turn of new tape over it. In doing so it doesn't show as an ugly patched repair.